May 10, 2026
Want better airflow in your car without paying a mechanic? You can absolutely do this yourself. Replacing a cabin air filter at home takes just 10 to 20 minutes.
Skipping the dealership can easily save you $20 to $60 in labor costs. Plus, a clean filter means stronger AC and fresher air for you and your passengers.
Ready to clear the air? Let's walk through the simple steps to get this done.
Replacing a cabin air filter is a quick, cost-effective DIY task that takes only 10 to 20 minutes.
Doing it yourself can save you labor costs.
A clean air filter improves airflow, strengthens your AC, and provides fresher air inside your car.
With just a few simple steps, you can enjoy better air quality and enhanced comfort on every drive.
Your cabin filter acts as a shield between the outside world and your car's interior. As air flows through your HVAC system, the filter traps dust, pollen, and debris. This keeps airborne particles out of your lungs.
A fresh filter also helps maintain clean airflow inside the vehicle. When the filter is clean, your air conditioning and heater don't have to work as hard. This impacts your overall HVAC performance and keeps your cabin comfortable.
A good rule of thumb is to replace your filter once per year. For most drivers, that happens every 12,000 to 30,000 miles. But your driving habits matter.
Do you drive on dusty dirt roads? Are you stuck in heavy city traffic, surrounded by exhaust fumes? If so, you might need a new one sooner. The same goes for allergy sufferers. A fresh filter can make a huge difference during heavy pollen seasons.
Your car will usually tell you when it's time for a change. Watch out for these common warning signs of a dirty filter:
Weak airflow from your vents, even on high fan settings.
Musty or unpleasant odors when the AC is running.
Increased dust settles quickly on your dashboard.
Foggy windows or poor defrost performance in the winter.
This is one of the easiest car maintenance jobs. You usually don't need any special tools. Before you begin your DIY cabin air filter replacement, grab a new cabin air filter with the correct fitment for your specific car.
You might also want a few optional items. Gloves help keep your hands clean. A flashlight helps you see under the dashboard in the dark. In rare cases, you might need a small screwdriver to pop off a plastic trim panel.
Here are the steps to replace the cabin air filter for most modern vehicles.
Start by parking on a flat surface and turning off the engine. Then, open your glove box and take everything out. You don't want your owner's manual and old receipts spilling onto the floorboards.
Wondering where the cabin air filter is located? In most modern cars, the glove box cabin air filter location is standard. It sits right behind the glove compartment. Less commonly, you might find it under the hood near the windshield base. Check your manual if you aren't sure.
To get behind the glove box, push the plastic tabs on the sides inward. This lets the compartment lower toward the floor. Once lowered, look for a rectangular plastic cover. Unclip the latches on the sides and remove this access cover.
Now you can see the old filter. Grab it and slide it out carefully. Try to keep any trapped leaves or dirt from falling into the blower motor below. Before you toss it in the trash, check the airflow direction arrow printed on the side.
Take a quick look inside the empty housing. If you see loose dirt, use a light vacuum or wipe it with a dry cloth. Never use liquids or harsh cleaners inside your car's air ducts.
Grab your new filter and look for the airflow arrows on the edge. Match the airflow direction of the old filter. Usually, the arrows should point down. Slide the new filter into place until it fits snugly.
Snap the plastic access cover back into place. Lift your glove box up until the side tabs click back into their tracks. Finally, turn on your car and run the fan on high to check the airflow. Enjoy that fresh, strong breeze!
Changing your filter is simple, but a few things can go wrong. Installing the filter backward is the most common error. If the airflow direction is wrong, the AC will struggle to push air through.
Buying the wrong size is another issue. A loose filter allows bypass air, allowing dirty air to sneak around the edges of the filter.
Also, avoid skipping replacement for too long, which strains your blower motor. Finally, make sure you seal the housing cover properly to keep the system airtight.
Most drivers can complete this in under 15 minutes. But there are a few exceptions. If your car requires removing the entire dashboard to reach the filter, you might want to hire a professional.
Seek a mechanic if you spot mold or water buildup inside the HVAC system. You should also get professional help if persistent odors remain after the new filter is installed.
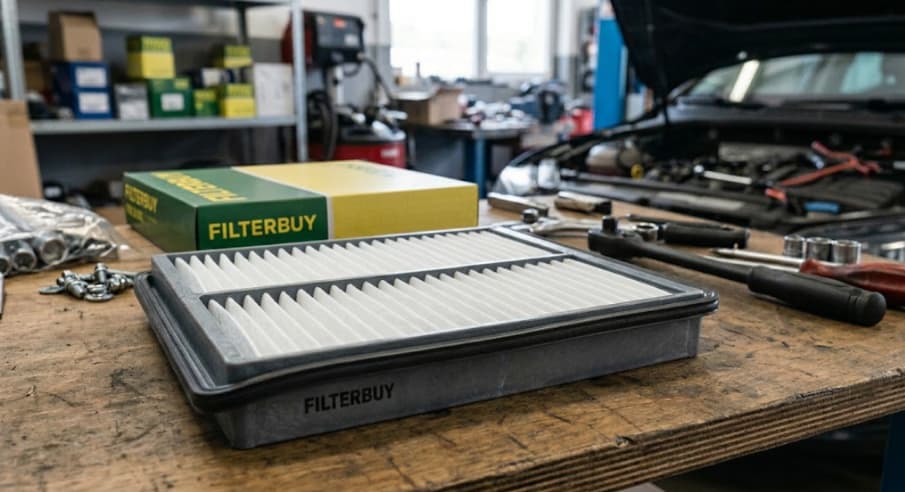
Quality matters when it comes to the air you breathe. You want a filter that traps tiny particles without blocking airflow.
Filterbuy auto cabin air filters use HEPA-certified synthetic media to trap 99.97% of airborne particles as small as 0.3 microns, including bacteria, pollen, mold spores, smoke, and pet dander.
Every filter is manufactured 100% in the USA to exact OEM tolerances, with advanced hydrocharging technology that permanently magnetizes every fiber for maximum particle capture without restricting airflow.
Available for hundreds of vehicles across all major makes and models, use the vehicle selector at filterbuy.com to find the right fit for your car.
Fitment is crucial. A perfect fit prevents bypass air from ruining your indoor air quality. Upgrading to a HEPA filter is a smart choice over standard paper filters. It provides incredible filtration. This upgrade is especially helpful if you battle seasonal allergies or commute through dusty city streets.
Learning how to change your car's cabin air filter is a simple DIY task that saves you time and money. More importantly, it ensures you and your passengers breathe cleaner air on every drive.
Making this a part of your regular car maintenance routine is a small step with big benefits for your health and your vehicle's AC system.
Ready for a breath of fresh air? Find the perfect filter for your vehicle at Filterbuy.
It takes about 10 to 20 minutes for most vehicles. You rarely need any tools to get the job done.
Yes, but it is not recommended. Driving without one exposes your HVAC system to debris, drastically reducing your air quality.
You can use an online vehicle selector tool. You can also check your car's owner's manual for the exact dimensions and part number.
Yes. A fresh filter provides better airflow and reduces strain on the blower motor and AC system.
They absolutely do. High-quality filters help reduce exposure to airborne particles like pollen, dust, and pet dander.