Mini Split Electrical Requirements:
Voltage, Amps & Wiring Guide
By Michelle Wan · Reviewed by David Clark, Licensed HVAC Technician
Published June 25, 2026 · Updated June 25, 2026
Mini Split Electrical Requirements: Voltage, Amps, and Wiring
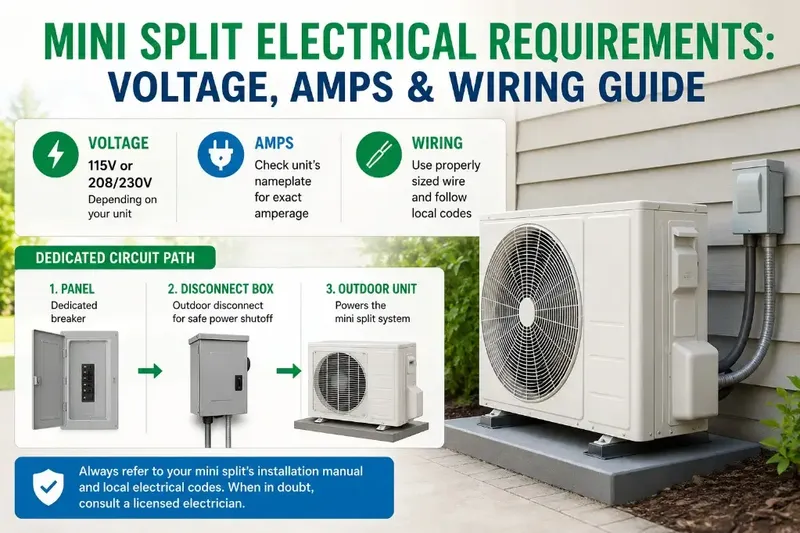
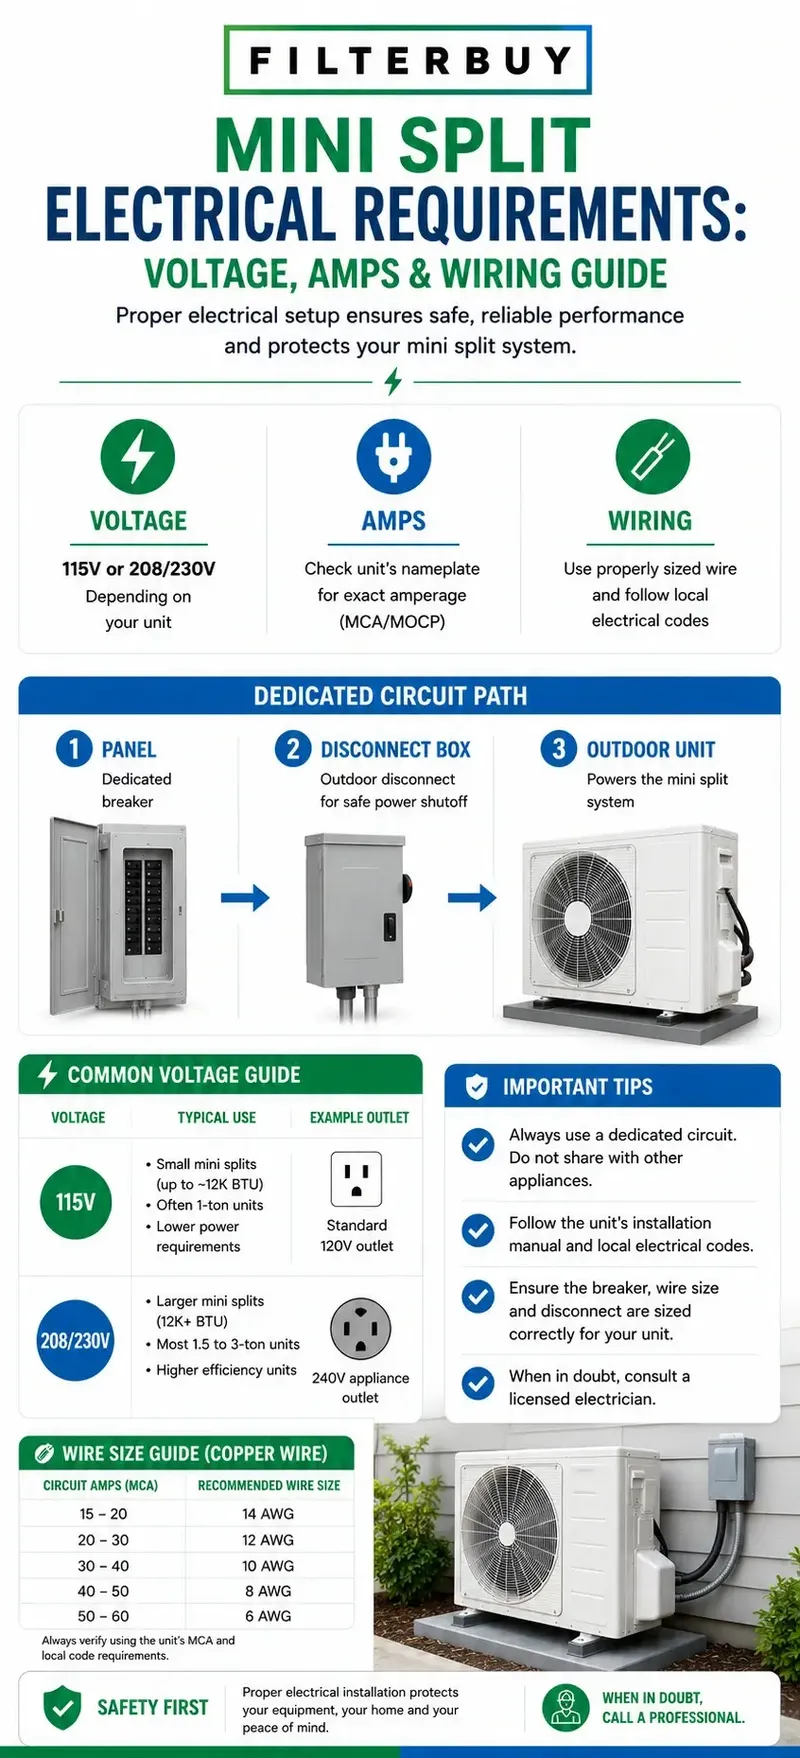
Most mini splits need their own dedicated circuit, hardwired straight to your electrical panel — never a wall outlet. Smaller 9,000–12,000 BTU units often run on 115V, while most 18,000 BTU and larger units (and nearly all multi-zone systems) need 208–230V. Your exact wire and breaker come from the outdoor unit's nameplate, not the BTU rating: MCA sizes the wire, MOCP caps the breaker.
By size, here is the usual pattern:
- 9,000–12,000 BTU — often 115V, single-pole breaker (15–20 A)
- 18,000–24,000 BTU — 208–230V, double-pole breaker (20–30 A)
- 36,000 BTU+ or multi-zone — 208–230V, larger double-pole breaker (30–40 A)
Not sure which size your space needs? Take the quick match quiz below.

Answer a few quick questions and we'll match you to the right mini split system for your space.
Mini Split Electrical Requirements at a Glance
Most mini splits need their own dedicated circuit hardwired to your electrical panel, never a wall outlet. Smaller 9,000–12,000 BTU units often run on 115V; most 18,000 BTU and larger units (and nearly all multi-zone systems) need 208–240V. Your real numbers live on the outdoor unit’s nameplate: MCA sizes the wire, MOCP caps the breaker. Match those, not the BTU alone.
Installing a ductless mini split, or just figuring out whether your panel can handle one, comes down to a few electrical basics, and that’s where most of the guesswork happens. The good news: once you know where to look, it’s simpler than it sounds. We’ll walk through it in plain English, backed by the code and the charts you actually need.
Do Mini Splits Need a Dedicated Circuit?
Yes. Every mini split needs its own dedicated circuit running from your electrical panel to a disconnect near the outdoor unit. You can’t plug one into a standard wall outlet or share a circuit with other devices, because the high startup surge would trip breakers or overheat shared wiring. A dedicated circuit is also typically required to pass inspection and to keep your manufacturer’s warranty valid.
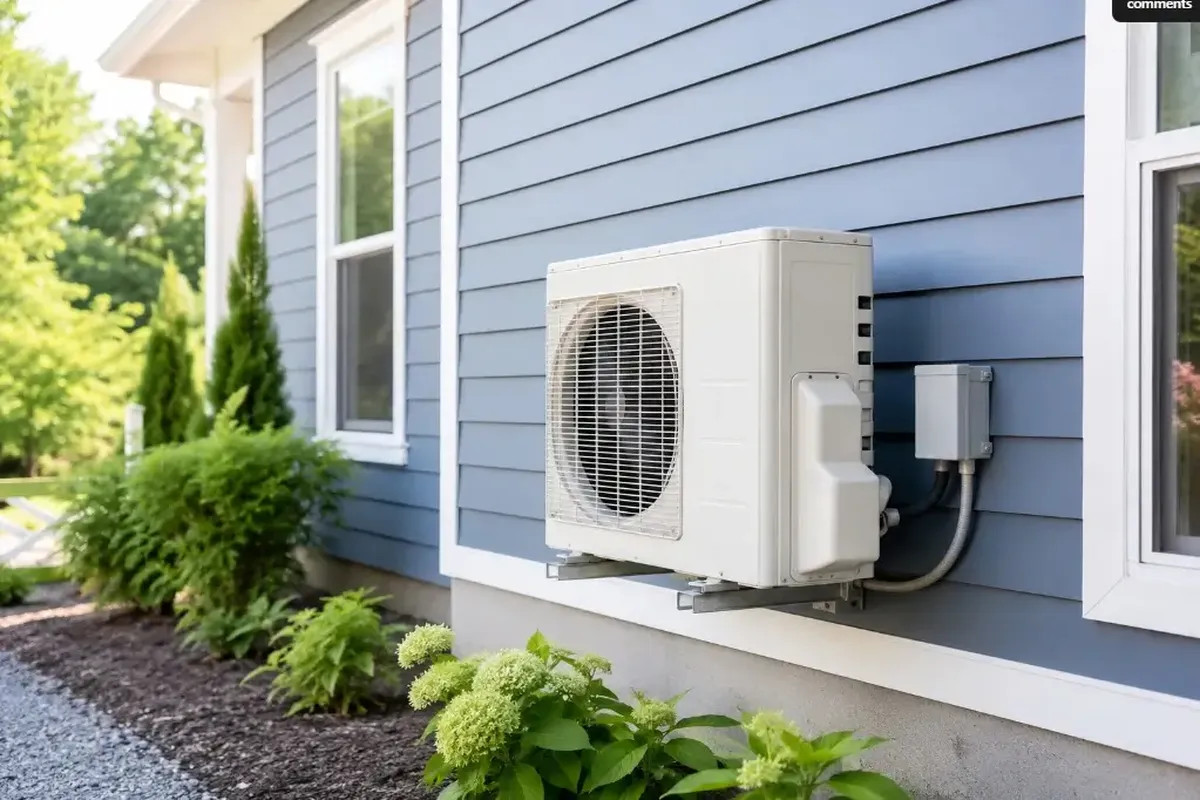
Mini splits are hardwired, not plug-in. Power runs from a dedicated breaker in your panel, out to a weatherproof disconnect box, and into the outdoor condenser, which then feeds the indoor head(s). Two reasons this circuit has to stand alone:
Startup surge. When the compressor kicks on, it briefly pulls 2–3 times its normal running current (“inrush current”). On a shared circuit, that spike trips breakers and stresses everything else plugged in.
Safety and code. A standard 120V outlet can’t deliver the voltage a 240V unit needs, and overloading a shared circuit is a real fire risk. Codes also require a disconnect within sight of the outdoor unit (NEC 440.14) so it can be safely shut off for service.
Bottom line: one mini split, one circuit. Two units? Two circuits. There’s no shortcut here, and it’s the part inspectors check first.
What Voltage Does a Mini Split Use, 110V or 220V?
Mini splits run on either 115V or 208–230V. Units up to about 12,000 BTU often use 115V, which needs one hot wire and a single-pole breaker. Most 18,000 BTU and larger units, and nearly all multi-zone systems, use 208–230V, which needs two hot wires and a double-pole breaker. Size alone isn’t a guarantee: some small units still require 230V, so always confirm the voltage on the nameplate.
Here’s the rule of thumb most people start with: smaller units, lower voltage. A 9,000 or 12,000 BTU unit, the kind you’d put in a bedroom, office, or small addition, will often run on the same 115V power as your everyday appliances. Step up to 18,000 BTU or bigger, or any multi-zone system feeding several rooms, and you’re almost always looking at 208–230V.
The difference matters for your breaker. A 115V circuit uses a single hot wire and a single-pole breaker. A 230V circuit uses two hot wires and a double-pole breaker that disconnects both “legs” at once. For multi-zone systems, the outdoor unit still gets one dedicated circuit, but it’s sized for the combined load of all the indoor heads, so expect higher voltage and a bigger breaker.
One myth worth clearing up: switching to 230V doesn’t make your unit more efficient. A unit’s SEER rating (how efficiently it uses energy) is the same whether the model is wired for 115V or 230V. Voltage is about delivering enough power safely, not about saving energy. And because size alone doesn’t always predict voltage (a few 6,000–9,000 BTU units require 230V), the nameplate is the only source of truth. For example, Filterbuy’s 12,000 BTU ductless mini split comes in both a 115V version and a 230V version, so the same capacity can land on either circuit type.
Mini Split Amp Draw by Size
A mini split’s amp draw depends on its size, efficiency, and voltage, not BTU alone. As a rough guide, a 12,000 BTU unit draws around 4–5 running amps at 230V; a 36,000 BTU unit can draw 11–16 amps. Important: running amps are not your breaker size. Always size the wire from the nameplate’s MCA and the breaker from its MOCP.
“Amp draw” trips a lot of people up, because there are really three different amperage numbers floating around, and they’re not interchangeable: the running amps (what the unit actually pulls in normal use), the MCA (the minimum circuit your wire must handle), and the MOCP (the biggest breaker you’re allowed to use). We’ll untangle MCA and MOCP in the next section. First, here’s a general reference for running draw and breaker size by unit size:
Typical ranges from manufacturer data; always size the circuit to your unit's nameplate MCA and the breaker to its MOCP (NEC 440.22). Running amps roughly double at 115V.
Read this as a ballpark, not gospel. Two 12,000 BTU units from different brands can have different electrical specs depending on efficiency and design. Running amps also roughly double on a 115V unit versus the same wattage at 230V, and the startup surge runs higher than the numbers above. The figures here are typical ranges drawn from manufacturer data. Your unit’s actual numbers are on its nameplate, and that’s what your electrician and your inspector will use.
MCA vs. MOCP: The Two Nameplate Numbers That Actually Size Your Circuit
Two numbers on the outdoor unit’s nameplate do the real work. MCA (Minimum Circuit Ampacity) is the smallest wire and circuit your system can safely use. MOCP (Maximum Overcurrent Protection) is the largest breaker allowed. Size your wire to handle at least the MCA, and choose a breaker equal to or below the MOCP, never higher. Don’t pick either one from the BTU rating.
This is the part the generic charts get wrong. They tell you “12,000 BTU = 15-amp breaker” as if BTU picks your breaker. It doesn’t. Your unit’s nameplate, the data plate on the outdoor condenser, lists two amperage numbers that override every chart on the internet:
MCA (Minimum Circuit Ampacity): the floor. Your wire and circuit must be able to carry at least this many amps. Size the wire gauge up to meet it.
MOCP / MOP (Maximum Overcurrent Protection): the ceiling. Your breaker must be equal to or smaller than this number. Go bigger and the breaker won’t protect the equipment when it should.
Get a breaker that’s too big and it won’t trip in time to protect your gear; too small and it’ll nuisance-trip every time the compressor starts. Here’s the simple way to do it right:
The Nameplate-First Method (4 Steps)
Find the data plate on the outdoor condenser (usually a metal sticker on the side panel).
Read the MCA and size your wire to safely carry at least that many amps over your run length.
Read the MOCP and choose a breaker equal to or below it, never higher. (This follows NEC 440.22, which governs how HVAC branch circuits are protected.)
Check the voltage 115V means a single-pole breaker; 208–230V means a double-pole. Then confirm it’s on a dedicated circuit with a disconnect within sight of the unit.
Do those four things and you’ve sized the circuit correctly for your unit. No chart-guessing, no nuisance trips, no failed inspection.
Wire Gauge, Disconnects, and Surge Protection
Mini splits use copper wire sized to the nameplate’s MCA, an outdoor-rated whip to the condenser, and a disconnect within sight of the outdoor unit (NEC 440.14). The connecting cable between the indoor and outdoor units is commonly 14/4 stranded copper. Use outdoor/wet-rated wire such as THWN-2 for the exterior run, because standard indoor Romex isn’t rated for it. A UL 1449-listed surge protector guards the unit’s sensitive inverter board.
Wire gauge: driven by the MCA and the length of the run, using copper (the HVAC standard). Longer runs may need a thicker wire to avoid voltage drop.
Disconnect: a weatherproof shutoff within sight of the outdoor unit is required by NEC 440.14 so the system can be de-energized safely for service.
Outdoor-rated wire: the exterior run needs wet-location-rated wire like THWN-2; ordinary NM-B (Romex) isn’t rated for outdoor/wet use even inside conduit.
Surge protection: modern mini splits run on inverter boards that don’t love power spikes. A UL 1449-listed surge device at the disconnect is cheap insurance against a costly board failure.
Panel capacity: older homes on 100-amp service may need a panel evaluation (or upgrade) before adding a mini split, especially alongside other big appliances.
The Maintenance Habit That Keeps Your Amp Draw Where It Belongs
A clean filter keeps your mini split drawing the amps it’s rated for. When the indoor unit’s filter clogs with dust, airflow drops, the system works harder to reach your set temperature, and running amps creep up, wasting energy and stressing the compressor. Rinsing or replacing the filter on schedule is the simplest way to protect both your power bill and your equipment.
Here’s something the wiring guides skip: your electrical draw isn’t fixed for life. It drifts with maintenance. A mini split moves air through a filter on the indoor head. As that filter loads up with dust, pet hair, and grime, airflow across the coil drops. The system compensates by running longer and harder to hit your thermostat setting, and that extra effort shows up as higher running amps and a higher power bill. Starve the airflow long enough and you’re putting real strain on the compressor, the most expensive part to replace. (For the deeper picture, here’s how a mini split’s filtration shapes your air quality and airflow.)
Keeping the filter clean is the highest-return, lowest-effort thing you can do for both efficiency and equipment life, a point ENERGY STAR echoes in recommending regular maintenance to keep ductless systems running efficiently.
We’ve manufactured filters in the U.S. for over a decade, so we’ll say it plainly: a $20 habit protects a multi-thousand-dollar system. Explore Filterbuy’s ductless mini split systems, built by the same team, with maintenance guides and filter-care reminders included.
When to Call a Licensed Electrician
Mini split high-voltage connections aren’t a typical DIY job. Most local codes require a licensed electrician to make the final panel and disconnect connections and to pull the permit. A pro confirms your panel has capacity, sizes the circuit to the nameplate, and makes sure the install passes inspection and keeps your warranty intact.
Plenty of homeowners mount the indoor head and run line-set themselves, but the high-voltage hookup is where you bring in a pro. A licensed electrician will verify your panel can carry the new load, size the breaker and wire to the nameplate (not a chart), install the disconnect to code, and handle the permit and inspection. On a safety-critical, code-governed job like this, that sign-off is worth it. When in doubt, get the quote. It’s cheaper than a redo or a warranty denial.
Mini Split Electrical FAQ